Gone are the days when bold hair color meant months of commitment and costly salon visits. The temporary hair color revolution has arrived, and at the forefront of this creative explosion are hair stencils—ingenious tools that transform your locks into a canvas for self-expression. Whether you’re preparing for a music festival, adding flair to your weekend look, or testing a daring design before making it permanent, the right stencil collection is your passport to limitless possibilities.
But here’s the thing: not all hair stencils are created equal. From the material they’re cut from to the complexity of their patterns, every detail impacts your final result. Building a versatile arsenal requires understanding the nuances that separate amateur attempts from head-turning masterpieces. This comprehensive guide dives deep into everything you need to know about selecting, using, and maintaining the perfect stencil collection—no specific product names, just pure expertise to help you make informed decisions for your unique creative vision.
Top 10 Hair Stencils for Temporary Color Designs
Detailed Product Reviews
1. Hair Tattoo Stencil Kit,Barber Stickers,25 Design Patterns Tattoo Patterns Salon Barber Tools Template Hair Styling Stickers with Roller for Creative Hair Carving

Overview: This comprehensive hair tattoo stencil kit delivers 25 distinct patterns designed for barbers and stylists seeking to expand their creative repertoire. The collection enables intricate hair carvings on short hair, transforming ordinary cuts into artistic statements. Compact and lightweight, this toolkit travels effortlessly between salon stations or mobile appointments, ensuring artistic expression isn’t location-dependent.
What Makes It Stand Out: The kit’s exceptional flexibility sets it apart—stencils can be bent and manipulated without losing structural integrity, conforming comfortably to various head shapes. Unlike rigid alternatives, these templates adapt to curved surfaces, ensuring cleaner lines and more precise designs. The inclusion of eco-friendly, odorless plastic demonstrates thoughtful manufacturing, prioritizing both environmental responsibility and client safety during prolonged scalp contact.
Value for Money: At $12.10 for 25 reusable stencils, this kit offers remarkable affordability, breaking down to less than 50 cents per design. Comparable professional stencil sets typically retail for $15-20, making this an economical entry point for stylists building their toolkit. The durability ensures dozens of applications per stencil, maximizing return on investment for both freelance and salon-based professionals.
Strengths and Weaknesses: Strengths: Highly flexible material prevents cracking; diverse pattern selection covers geometric, organic, and themed designs; portable size fits standard tool cases; eco-conscious construction; budget-friendly pricing. Weaknesses: Product description contains grammatical errors suggesting potential quality control issues; no application instructions included; roller tool mention lacks detail about its function; plastic thickness unspecified.
Bottom Line: This stencil kit represents excellent value for creative barbers wanting to offer hair tattoo services without significant upfront investment. While documentation could improve, the functional quality and pattern variety make it a worthwhile purchase for professionals and advanced home users ready to experiment with hair artistry.
2. OPAWZ Blow Pen 10 Colors with Tattoo Stencil 12pcs Suit, Temporary Color Dog Hair Dye, Non-Toxic and Washable Pet Hair Dye, Semi Permanent Color Dye for Dogs and Cats Grooming

Overview: OPAWZ revolutionizes pet grooming with this innovative blow pen system delivering temporary color through a simple breath-activated spray mechanism. The set includes ten vibrant hues and twelve reusable tattoo stencils specifically designed for animal coats. This non-toxic, washable formula allows groomers and pet owners to create festive designs safely for dogs and cats.
What Makes It Stand Out: The unique blow-application method eliminates traditional brushwork, reducing stress for sensitive pets while enabling precise stencil work. The color variety spans from classic black to bold pink and green, offering creative versatility. The reusable stencils feature pre-cut designs sized appropriately for pet anatomy, and the manufacturer provides a refresh technique—adding water to extend pen life—demonstrating practical product stewardship.
Value for Money: Priced at $24.99 for ten colors and twelve stencils ($2.50 per item), this kit sits in the mid-range for pet grooming accessories. Individual temporary pet dyes often cost $8-12 each, making this bundle cost-effective for multi-color designs. The reusability of stencils and refreshable pens extends the product lifespan, offering better long-term value than single-use alternatives.
Strengths and Weaknesses: Strengths: Non-toxic formula safe for animal contact; innovative blow-spray reduces grooming time; vibrant color selection; stencils are reusable and pet-safe; washable removal prevents staining; manufacturer provides usage restoration tips. Weaknesses: Non-returnable policy due to mouth contact; requires dry, clean coat for optimal results; color longevity varies by hair porosity; explicitly warns against eye/mouth contact; no mention of vegan/cruelty-free certification.
Bottom Line: Ideal for creative groomers and pet owners seeking safe, temporary artistic expression. The blow-pen mechanism is particularly valuable for anxious animals. Despite the strict return policy, the quality, safety profile, and restoration feature make this a smart investment for regular pet stylists and festive occasions.
3. FRCOLOR Hair Tattoo Stencil Kit 25 Pieces Creative Hair Design Stencils for Temporary Patterns Semi-Permanent Body Tattoos for Festivals Birthdays and Salon Use 7.87X3.54 Inches

Overview: FRCOLOR’s 25-piece stencil kit targets versatile styling applications, from professional salon work to festival body art. Measuring 7.87 by 3.54 inches, these templates accommodate both hair carving and temporary skin tattoos. The lightweight, flexible construction promises easy application across diverse settings, making it suitable for barbers, stylists, and creative individuals seeking temporary artistic expression.
What Makes It Stand Out: This kit’s dual-purpose design distinguishes it—stencils function equally well for hair tattoos and semi-permanent body art, maximizing utility. The skin-safe plastic formulation specifically addresses scalp irritation concerns, a critical consideration for clients with sensitive skin. The compact 2.3-ounce weight makes it exceptionally travel-friendly, while the pre-sized dimensions align perfectly with standard hair sections and body areas.
Value for Money: At $13.79 for 25 stencils, this kit offers competitive pricing at approximately 55 cents per template. While slightly pricier than some alternatives, the dual-functionality effectively doubles its value proposition. Similar single-purpose stencil sets cost $10-15, making the added versatility a cost-effective bonus for professionals offering both hair and body art services.
Strengths and Weaknesses: Strengths: Dual hair and body art functionality; skin-safe material reduces allergic reactions; flexible design conforms to contours; lightweight portability; diverse pattern selection for multiple occasions; clear sizing specifications. Weaknesses: Price point marginally higher than hair-only competitors; “semi-permanent body tattoo” claim may confuse customers seeking truly temporary options; no mention of stencil thickness or durability; limited information about pattern themes.
Bottom Line: A versatile choice for multi-talented artists serving both hair and body art markets. The skin-safe formulation and dual-purpose design justify the modest price premium. While marketing clarity could improve, the functional versatility makes this an excellent addition for mobile stylists and festival artists seeking maximum utility from minimal kit.
4. HEATSHAKING 25Pcs Hair Tattoo Stencil Set Creative Hair Patterns for DIY Styling Designs for Men and Women for Salon Use and Special Occasions

Overview: HEATSHAKING’s 25-piece stencil collection targets DIY enthusiasts and salon professionals seeking creative hair decoration solutions. Marketed for both men and women, this set promises transformative designs for special events, birthdays, and festivals. The product description emphasizes shimmering results through a press-and-adhesive application method, positioning it as an accessible entry point for decorative hair artistry.
What Makes It Stand Out: The kit’s emphasis on DIY accessibility distinguishes it from professional-only tools. The description suggests a simplified process: press stencil, apply safe glue, and brush for shimmering designs. This approach lowers the skill barrier for home users. The marketing highlights versatility across numerous occasions, from graduations to work events, indicating broad demographic appeal beyond traditional barber shop culture.
Value for Money: Priced at $12.59 for 25 stencils, this kit offers standard market value at roughly 50 cents per piece. However, the product description’s grammatical inconsistencies and confusing mentions of “hair extensions” and “earrings” raise concerns about quality assurance. While competitively priced, potential buyers should verify actual contents, as the description lacks clarity about included adhesives or applicators.
Strengths and Weaknesses: Strengths: Affordable entry-level pricing; 25 diverse patterns; marketed for broad demographic appeal; emphasizes DIY-friendly application; suitable for multiple occasions. Weaknesses: Product description is incoherent and mentions unrelated items; no material specifications; unclear if adhesives/glitter are included; “waterproof hair tattoos” claim lacks context; no dimensions provided; quality concerns due to poor copy.
Bottom Line: Proceed with caution. While the price is attractive and the pattern quantity adequate, the severely flawed product description suggests potential listing errors or quality control issues. Verify seller reputation and request clarification before purchasing. Better suited for experimental home users than professional stylists requiring reliable documentation.
5. Zenia 6 Pack 100% Natural Ready to Use Henna Paste Hair Color Hair Dye Cones Reddish Brown Color

Overview: Zenia delivers traditional henna hair coloring in modern ready-to-use cones, eliminating mixing hassles for natural dye enthusiasts. This six-pack provides 100% chemical-free henna paste in a reddish-brown shade, with each cone containing 24-28 grams of product. Designed for natural hair coloring, the formula develops gradually over 24-48 hours, offering a gentle alternative to synthetic dyes.
What Makes It Stand Out: The ready-to-use cone format revolutionizes henna application, removing the time-consuming powder mixing process while ensuring consistent paste quality. Triple-sifting guarantees smooth, lump-free application—a critical factor for even color distribution. The product’s commitment to natural ingredients appeals to health-conscious consumers, and the refrigeration storage recommendation demonstrates understanding of henna’s perishable nature.
Value for Money: At $8.95 for six cones ($1.79 each), this offers exceptional value compared to salon henna treatments costing $50-100. Individual henna cones typically retail for $3-5, making this bundle highly economical. The 24-28 gram size provides sufficient product for root touch-ups or short to medium hair applications, maximizing utility per cone. The money-back guarantee further reduces purchase risk.
Strengths and Weaknesses: Strengths: 100% natural, chemical-free formulation; ready-to-use convenience saves preparation time; triple-sifted paste ensures smooth application; cost-effective compared to salon services; satisfaction guarantee; clear storage instructions. Weaknesses: Reddish-brown shade may not appear on dark hair (only subtle undertones); 24-48 hour color development requires patience; perishable product requiring refrigeration; wrapper color varies randomly (minor aesthetic issue); limited to one shade per pack.
Bottom Line: An excellent choice for natural dye devotees seeking convenience without compromising purity. The ready-to-use format and aggressive pricing make professional-quality henna accessible for home use. While color development requires patience and dark hair results are subtle, the quality, value, and guarantee make this a top recommendation for chemical-free coloring enthusiasts.
6. 20 Sheets Temporary Tattoo Stencil Kit, Tattoo Templates for Real Tattoos Mehndi Stencils for Kids Teens Adults Body Paint

Overview: This 20-sheet temporary tattoo stencil kit offers a gateway into body art without permanence. Designed for kids, teens, and adults, these PVC templates feature mehndi-inspired patterns ranging from celestial moons to tribal designs, making them versatile for various occasions.
What Makes It Stand Out: The reusable PVC construction sets this kit apart—unlike single-use stencils, these can be cleaned and reused multiple times with proper care. The diverse design library includes butterflies, flowers, and geometric patterns that appeal to different aesthetics. Their waterproof nature ensures durability during application, while the straightforward peel-and-stick method works with airbrush, henna, or body paints.
Value for Money: At $8.69 for 20 sheets ($0.43 per stencil), this kit delivers solid value. The reusability factor multiplies the cost-effectiveness, essentially providing unlimited temporary tattoos from a single purchase. Comparable kits with disposable stencils require constant repurchasing, making this a budget-friendly choice for party planners, parents, or casual users.
Strengths and Weaknesses: Strengths include durable waterproof PVC, diverse pattern selection, multi-surface compatibility, and genuine reusability. The stencils adhere well to skin contours and work with various paint mediums. Weaknesses are the limited 20-sheet quantity for larger events, potential environmental concerns with PVC material, and a slight learning curve to prevent paint bleed. Darker skin tones may require more opaque paints for visibility.
Bottom Line: An excellent starter kit for temporary body art enthusiasts. The reusable design and pattern variety justify the price, making it ideal for small gatherings, family fun, or personal experimentation. While not suited for large-scale events without additional sheets, it performs reliably for its intended purpose.
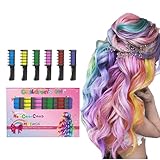
7. New Hair Chalk Comb Temporary DIY Hair Color for girls kids age 4 5 6 7 8 9 10 Washable Hair Chalk for Christmas Birthday Cosplay (Blue, Yellow, Purple, Red, Green, Pink)
Overview: This six-pack of mini hair chalk combs targets young girls seeking temporary color transformations. Designed for ages 4-10, the set includes blue, yellow, purple, red, green, and pink shades for creative expression during parties, cosplay, or daily play.
What Makes It Stand Out: The compact 3.99-inch design makes these combs exceptionally portable and manageable for small hands. Unlike traditional chalk sticks, the comb applicator provides controlled distribution, reducing mess. The water-soluble formula washes out completely with shampoo within three days, offering commitment-free experimentation. The product specifically markets itself as a gift item for various celebrations.
Value for Money: Priced at $8.98 ($1.50 per comb), this set sits in the budget-friendly category. Each comb provides 1-2 uses for long hair or 4-5 uses for short hair when properly stored, making it economical for occasional play. However, frequent users will need to repurchase often, potentially diminishing long-term value compared to larger alternatives.
Strengths and Weaknesses: Strengths include non-toxic formulation, easy cleanup, child-friendly size, and vibrant results on light hair. The compact design suits travel and party favors. Significant weaknesses involve poor color payoff on dark or brown hair even with extensive preparation (blow-drying, hairspray), limited applications per comb, and a sticky residue that requires setting time. The product essentially demands blonde hair for best results.
Bottom Line: Best suited for fair-haired children seeking temporary, low-commitment color. While the concept and safety profile excel, the dark hair limitation and limited uses per comb restrict its universal appeal. Consider only if your child has light hair and wants occasional colorful accents.
8. 10 Colors Festive Fun Hair Chalk CombsInstant Hair Color Comb,Washable & Temporary Hair Color Dye for All Ages, Hair DIY Perfect for Birthday Party Christmas Gifts New Year

Overview: This ten-color hair chalk comb collection promises vibrant temporary color for all ages and hair types. The set eliminates traditional chalk mess through an innovative applicator design, delivering instant pigment without water or heat for parties, festivals, and creative styling.
What Makes It Stand Out: Unlike many competitors, this kit explicitly claims effectiveness on all hair colors—from blonde to dark curly hair—removing the common dark-hair limitation. The no-mess formula prevents dripping and staining on clothes or towels, addressing parents’ primary concerns. The compact, travel-friendly design suits on-the-go touch-ups, while the washable formula removes completely with one shampoo.
Value for Money: At $9.99 for ten colors, this set offers competitive pricing with superior versatility. The all-hair-types capability broadens its user base significantly, providing better value than products limited to light hair. While the listed “$999.00 per ounce” appears to be a data error, the actual product price remains reasonable for the color variety and claimed performance.
Strengths and Weaknesses: Major strengths include universal hair compatibility, clean application, vibrant pigmentation, and easy removal. The set works without complicated steps and travels well. Weaknesses involve potential fading without hairspray setting (though this is normal for temporary chalk), possible dryness with repeated use, and the need for slight dampening on darker hair for optimal results. The exaggerated ounce pricing in the listing may confuse buyers.
Bottom Line: A versatile, family-friendly option that delivers on its universal hair claims. The mess-free design and vibrant results make it ideal for multi-child households or parties with diverse hair types. Highly recommended for those seeking reliable, temporary color without the typical dark-hair disappointment.
9. Yazhiji 183PCS Temporary Tattoo Stencils, Paint Stencils Kit on Face and Body, Girl Boy Glitter Tattoos Stencils Pack for Kids School Show Birthdays Halloween Christmas Party Favor Supplies

Overview: Yazhiji’s massive 183-piece temporary tattoo stencil kit dominates the quantity game, offering 12 A5 sheets packed with diverse designs from unicorns to dinosaurs. Marketed for kids’ parties and school events, this set provides endless creative possibilities for face and body art.
What Makes It Stand Out: The sheer volume of designs—spanning animals, celestial objects, letters, and themed motifs—ensures every child finds something appealing. Safety certification as non-toxic and non-allergic for ages 3+ provides parental peace of mind. The waterproof construction maintains integrity during application, while the included practice sheets and guide help beginners achieve professional-looking results.
Value for Money: At $6.99 for 183 stencils ($0.04 each), this kit offers exceptional value, especially for large gatherings. The cost per design is negligible, making it perfect for party favors, classroom activities, or carnival booths. Even if many designs go unused, the price point remains competitive against smaller, more expensive sets.
Strengths and Weaknesses: Strengths include unprecedented design variety, child-safe materials, detailed application guide, and waterproof durability. The A5 sheet format keeps designs appropriately sized for children’s faces and arms. Weaknesses involve potential storage challenges with numerous small stencils, possible quality variance across such a large batch, and limited reusability compared to thicker PVC alternatives. Some intricate designs may tear during removal.
Bottom Line: An unbeatable choice for large-scale events and party planners. The extensive selection and safety credentials outweigh minor quality concerns. While not the most durable option for repeated personal use, it excels as a disposable, high-volume solution for entertaining groups of children creatively and affordably.
10. 10 Color New Hair Chalk Comb Temporary Bright Hair Color Dye for Kids,Washable Hair Chalk Girls New Year Birthday Cosplay DIY(Dark Blue&Blue&Green&Purple&Brown&Pink&Orange&Red&Dark Green&Yellow)

Overview: This ten-color hair chalk comb set provides a rainbow palette for kids seeking temporary hair transformations. With shades from dark blue to yellow, the compact 3.9-inch combs enable DIY color experimentation for parties, cosplay, and everyday fun.
What Makes It Stand Out: The extensive color range—including browns and dark greens alongside bright primaries—allows for more nuanced styling than typical sets. The washable, non-toxic formula prioritizes child safety, while the mini portable design suits small hands and travel. Explicit instructions for dark hair application demonstrate manufacturer transparency about product limitations.
Value for Money: At $7.98 for ten colors, this set undercuts many competitors while offering more shades. The price per color is economical, though the mini size limits applications to 1-2 uses for long hair. For occasional play, the value proposition remains strong, particularly given the broader color spectrum.
Strengths and Weaknesses: Strengths include diverse color selection, non-toxic formulation, easy shampoo removal, and honest marketing about dark hair challenges. The compact size enhances portability. Significant weaknesses mirror similar products: poor color payoff on black/brown hair despite multi-step preparation, sticky residue requiring blow-drying, and normal fading/dryness issues inherent to temporary chalk. Storage requires sealing to prevent drying out.
Bottom Line: A solid, budget-conscious choice for light-haired children wanting color variety. The expanded palette and safety profile make it party-ready, but dark-haired kids will experience frustration. Purchase with realistic expectations about performance limitations and lifespan per comb.
The 10 Essential Stencil Categories for Every Collection
A truly versatile stencil library isn’t about quantity—it’s about strategic diversity. Think of your collection as a curated art supply rather than a random assortment. The most effective libraries include designs that range from geometric precision to freeform creativity, ensuring you’re ready for any occasion or inspiration that strikes.
Geometric Patterns: The Foundation of Design
These are the workhorses of any serious collection. Triangles, hexagons, chevrons, and grid patterns create clean, modern looks that photograph beautifully and work on virtually any hair length. Look for stencils with varying line weights—some with delicate, hairline-thin details and others with bold, chunky shapes. The best geometric sets include both symmetrical and asymmetrical options, allowing you to create everything from tribal-inspired borders to futuristic pixelated effects. When evaluating these stencils, check that the corners are precisely cut; rounded or jagged edges will betray your design instantly.
Nature-Inspired Motifs: Bringing the Outdoors In
Floral designs, leafy vines, and botanical silhouettes add an organic softness that contrasts beautifully with hair’s natural texture. The key here is finding stencils that offer layered complexity—a single flower stencil should have options for petals, centers, and leaf accents that can be used together or separately. Pay attention to the flow and movement within the design; rigid, unnatural-looking botanicals will read as inauthentic. The most versatile nature stencils work across seasons, from delicate cherry blossoms to bold tropical fronds.
Celestial Bodies: Stars, Moons, and Cosmic Patterns
There’s something universally appealing about cosmic designs. Moon phases, constellation dots, starbursts, and planetary rings tap into a sense of wonder that works for both ethereal daytime looks and dramatic evening styles. When selecting celestial stencils, prioritize those with varying dot sizes and line densities. The best cosmic collections include both dense clusters for impact areas and scattered individual elements for building custom starfields across larger sections of hair.
Cultural and Symbolic Art: Meaningful Expression
From mandala-inspired geometries to symbolic icons, these designs carry personal significance. The key is approaching these with respect and understanding their origins. Look for stencils that offer authentic representations rather than watered-down approximations. The cutting precision matters enormously here—sacred geometry requires mathematical accuracy to maintain its energetic properties. Consider the scale carefully; a too-small mandala loses its meditative quality, while an oversized symbol might overwhelm your canvas.
Festive and Seasonal Themes: Celebrate in Style
Holiday-specific stencils might seem niche, but they’re invaluable for creating timely, shareable looks. The trick is finding designs that transcend cliché—a subtle snowflake pattern can be reimagined as a geometric accent in summer, while heart shapes work year-round for various expressions. Evaluate these stencils based on their versatility: can that Halloween bat be rotated to become a butterfly? Does the Christmas tree silhouette double as a pine forest for nature looks? The best festive stencils offer this kind of creative duality.
Abstract and Fluid Shapes: Unleash Creativity
Sometimes you need designs that defy categorization—paint splatters, ink blots, flowing ribbons, and organic blobs. These stencils serve as the abstract artists in your toolkit, perfect for creating backgrounds, filling awkward spaces, or adding that final unpredictable element. The most valuable abstract stencils feature irregular edges that blend seamlessly into hair, avoiding harsh lines. Look for designs with varied opacity potential; a good abstract stencil should work with both heavy saturation and subtle ghosting techniques.
Animal Prints and Wildlife Patterns: Go Wild
Leopard spots, zebra stripes, and snakeskin textures add fierce energy to any style. The sophistication lies in the scale variation and edge softness. Amateur animal print stencils have uniform spots that look cartoonish; professional-grade options feature subtle size shifts and feathered edges that mimic natural patterns. Consider how these designs will flow with your hair’s movement—static patterns that don’t account for hair’s three-dimensional nature will break the illusion when you turn your head.
Typography and Numerals: Personalize Your Message
Letter and number stencils require exceptional precision—there’s no room for error when spelling out words or dates. The best typographic stencils include kerning guides or connection points that help you align characters perfectly. Look for fonts that balance readability with style; overly ornate scripts become illegible at small sizes, while too-simple block letters lack personality. Some advanced collections include partial letters designed specifically for creating words that curve around the head’s contours.
Textural Illusions: Lace, Mesh, and Fabric Effects
These stencils create the illusion of wearing hair accessories or fabric overlays. Lace patterns should include both positive and negative space options—sometimes you want the lace itself colored, other times you want the background filled with the lace pattern left natural. Mesh and netting stencils require extremely fine cutting capabilities; hold them up to light to check for consistency. The best textural stencils create trompe-l’œil effects that make viewers do double-takes.
Customizable Blank Templates: Your Imagination, Your Rules
Every collection needs blank stencil material—sheets you can cut yourself for truly original designs. These should be made from the same professional-grade material as pre-cut stencils, not flimsy craft store alternatives. Look for packs that include multiple sheet sizes and come with safe cutting tools or guides. The material should be thick enough to prevent tearing during application but thin enough to contour to the scalp. This category transforms you from consumer to creator.
Material Matters: Choosing the Right Stencil Substrate
The material your stencils are cut from determines everything from durability to application ease. This isn’t the place to compromise—substrate quality directly impacts your results.
Plastic vs. Silicone: Durability and Flexibility
Traditional plastic stencils offer rigidity that ensures clean lines, especially for geometric designs. They lay flat against the head and don’t shift easily, making them ideal for beginners. However, they can crack with repeated use and may not conform to curved areas like the crown. Silicone stencils, conversely, flex and mold to your head’s contours, creating seamless contact that prevents bleeding. They’re virtually indestructible but require more practice to hold steady during application. For a complete collection, you need both: plastic for flat areas and straight lines, silicone for curved sections and intricate details.
Biodegradable Options for Eco-Conscious Creators
The environmental impact of single-use stencils has sparked innovation in biodegradable materials. These plant-based substrates perform surprisingly well for one or two applications before naturally decomposing. They’re perfect for festival-goers who want to create looks on-site without carrying home dirty stencils. The trade-off is precision—biodegradable materials absorb moisture from color formulas, potentially causing slight bleeding. They work best with dry application methods like chalks or powders rather than wet sprays. Consider these for experimental designs where perfection isn’t paramount.
Mesh Density and Its Impact on Precision
Mesh-backed stencils represent the premium tier, combining rigid frames with flexible mesh centers. The mesh density—measured in threads per inch—dictates how fine your details can be. High-density meshes (above 120 TPI) capture photographic-level detail but require thin color formulas and careful application pressure. Lower density meshes (60-80 TPI) are more forgiving and work with thicker products. Your collection should include a range of densities, with your most-used designs on medium-density mesh for versatility.
Size and Scale: Building a Versatile Arsenal
A common mistake is collecting only standard-sized stencils. Hair is a three-dimensional canvas, and your tools must account for that reality.
Micro-Stencils for Detail Work
These palm-sized stencils focus on single elements—a single flower, one star, a small geometric accent. They’re invaluable for creating focal points, filling gaps in larger designs, or adding highlights around the face. The best micro-stencils include registration marks—tiny alignment dots that help you position them perfectly relative to other elements. When shopping, look for sets that nest together for compact storage. The material thickness is critical here; too thick and they’re clumsy to position, too thin and they’ll warp after one use.
Medium Stencils for Versatile Application
Roughly 5x7 inches, these are your everyday workhorses. They cover substantial sections of hair while remaining maneuverable. The ideal medium stencil includes multiple design elements that work together—perhaps a main pattern with coordinating corner pieces or border options. Evaluate the negative space ratio: designs that are too dense waste color and create muddy results, while too much empty space requires multiple applications to build impact. The sweet spot is about 60% design, 40% negative space.
Large Statement Pieces for Bold Looks
Full-panel stencils that span from ear to ear create jaw-dropping transformations perfect for events and performances. These require serious investment in quality—any warping or inconsistency is magnified at this scale. Look for large stencils with reinforced edges that prevent curling and include multiple handholds or grip points. The design should be engineered to work with hair’s natural part lines and growth patterns. Some premium large stencils come with companion placement guides, essentially transparent overlays that help you position the main stencil perfectly before committing to color application.
Reusability and Long-Term Value
Disposable stencils might seem economical initially, but a truly reusable collection pays for itself after just a few applications while delivering superior results.
What Makes a Stencil Truly Reusable
It starts with material thickness—professional-grade stencils use substrate that’s at least 0.3mm thick, preventing the microscopic tears that render cheap stencils useless after one wash. The cutting method matters too. Laser-cut edges maintain their sharpness through hundreds of applications, while die-cut stencils develop fuzzy edges that cause bleeding. Examine the corners and fine details; these stress points reveal a stencil’s true durability. A reusable stencil also resists chemical breakdown from color formulas, neither absorbing pigments nor reacting with alcohol-based sprays.
Cleaning and Maintenance Best Practices
Immediate cleaning is non-negotiable. Rinse stencils under cool water within minutes of application, before colors can dry and bond to the material. For stubborn pigment buildup, use a soft brush and mild soap—never harsh chemicals that might degrade the substrate. Silicone stencils can handle gentle scrubbing, while plastic versions need softer treatment to prevent scratching. Develop a routine: rinse, pat dry with lint-free cloth, air dry completely, then store. Some professionals keep separate stencils for light and dark colors to prevent cross-contamination that might muddy future applications.
Storage Solutions to Prevent Damage
Stencils should be stored flat in rigid portfolios, not rolled or folded. Invest in acid-free plastic sleeves that prevent scratching and keep dust at bay. Organize by category and frequency of use—your daily go-tos in front, specialty pieces in back. Temperature matters; extreme heat can warp plastic, while cold makes silicone brittle. A climate-controlled drawer or cabinet maintains material integrity. For travel, use hard-shell cases with individual compartments. Never stack stencils without protective layers between them, as static can cause them to stick together and peel each other’s designs.
Compatibility with Different Color Formulas
Your stencils are only as good as their relationship with your coloring products. Mismatched combinations lead to frustration and mediocre results.
Working with Hair Chalks and Pigments
Dry applications require stencils with slightly larger cutouts—chalk particles need room to transfer without excessive pressure that might shift the stencil. The material should have a slight texture that grips the hair, preventing the chalk from sliding underneath. Plastic stencils generally outperform silicone for chalk work since they create a firmer barrier. When using pigments, look for stencils with built-in tapping zones—solid areas where you can bounce your applicator without disturbing the design. Avoid mesh stencils for dry formulas; the powder falls through the weave.
Spray Applications: Techniques for Even Coverage
Spray colors demand stencils that create an absolute seal. Silicone excels here, conforming to every hair follicle and preventing overspray bleed. The stencil thickness should be minimal—thick edges create shadows and lines where color builds up unevenly. Look for spray-specific stencils with built-in ventilation holes that prevent pressure buildup while maintaining the seal. These tiny perforations allow air to escape as you spray, ensuring the stencil stays flush against the hair. For gradient effects, some advanced stencils include gradient zones—areas with gradually increasing mesh density that create natural color transitions.
Gel and Cream-Based Color Applications
Thick formulas require stencils with deep, clean-cut channels that can hold product without it seeping underneath. The edges should be beveled slightly inward, creating a reservoir effect. Silicone works well for creams because its flexibility maintains contact even as you spread the product. For gel applications, consider stencils with built-in squeegee edges—raised rims that help you scrape away excess product for perfectly even coverage. Wash these stencils immediately; dried gel is nearly impossible to remove and ruins the stencil’s precision.
Placement and Positioning Strategies
Even perfect stencils fail with poor placement. Mastering positioning transforms your results from craft-project to couture.
Mapping Your Design: Planning Before Application
Always dry-fit your stencil before adding any color. Use a water-filled spray bottle to lightly mist the hair, then press the stencil in place. The dampness creates temporary adhesion and lets you see exactly where the design will land. Take photos from multiple angles—what looks centered from the front might be off-kilter from the side. For symmetrical designs, mark reference points on the scalp with washable eyeliner. Consider how the design will move when you turn your head; a static stencil might look awkward in motion. Create a placement journal, photographing successful arrangements for future reference.
Securing Stencils: Tips for Clean Edges
Static is your enemy. Run a dryer sheet over both the stencil and your hair before application to reduce static cling that causes shifting. For plastic stencils, use light-hold hairspray on the underside—just enough to create tackiness without leaving residue. Silicone stencils benefit from a thin layer of styling gel applied to the edges, creating a temporary seal. Never use tape; it pulls hair and creates visible lines. Instead, enlist a friend to hold corners while you work, or invest in stencil weights—tiny, flat magnets that pin the stencil to a metal headband underneath.
Working with Different Hair Textures and Lengths
Fine, straight hair requires minimal pressure to achieve crisp lines; heavy-handed application pushes color underneath. For curly or coily hair, stretch the section taut while applying the stencil, then release to see the design spring to life. Short hair demands smaller stencils and more frequent repositioning—there’s less canvas to work with. Long hair offers the opportunity to wrap stencils around sections, creating continuous designs that flow from front to back. For thick hair, use sectioning clips to create thin, manageable layers; applying color to compressed hair results in patchy transfer.
Advanced Design Techniques
Once you’ve mastered basic application, these sophisticated methods elevate your work to editorial quality.
Layering Multiple Stencils for Complex Art
Layering isn’t just about stacking—it’s about strategic transparency. Start with your base layer, applying the lightest color. Remove that stencil and immediately cover the colored areas with a protective shield (a blank stencil sheet) before applying the next layer. This prevents colors from mixing and becoming muddy. The key is planning your layer order: background to foreground, light to dark. Some professional stencil sets include registration marks—tiny holes that align across multiple stencils, ensuring perfect positioning for each subsequent layer. Practice on paper first to understand how overlapping designs create new shapes.
Creating Negative Space and Reverse Stenciling
Negative space designs leave the hair’s natural color as the pattern, coloring everything around it. This requires stencils with solid designs and open backgrounds—essentially the opposite of traditional stencils. The technique demands precise edge control; any bleed ruins the effect. Reverse stenciling involves applying color everywhere, then using a clean, dry stencil to lift color away in specific patterns. This works beautifully with spray formulas on light hair. The stencil essentially becomes a removal tool, creating ghostly, ethereal designs that look hand-painted.
Blending Colors Within Stencil Boundaries
Who says one stencil equals one color? Use the stencil’s channels to contain multiple shades. Apply the darkest color to the edges, then quickly blend toward the center with a lighter shade before either dries. Some stencils include built-in blending zones—areas where the design intentionally fades or breaks, creating natural transition points. For ombré effects within a single design, hold the stencil slightly away from the hair at one edge while spraying; the increased distance creates a softer color deposit. Work fast; most temporary colors set within 60-90 seconds, after which blending becomes impossible.
Customization: When to DIY Your Own Stencils
Sometimes the perfect design doesn’t exist commercially. Knowing when and how to create custom stencils separates hobbyists from true artists.
Materials for Creating Personalized Designs
Professional stencil blanks come in various substrates, but not all are suitable for home cutting. For hand-cutting, use 0.5mm plastic sheets—thick enough to be durable but thin enough to cut with a sharp craft knife. For digital cutting machines, specialty stencil vinyl offers the best of both worlds: flexibility and precision. Avoid standard craft vinyl; it’s too thin and warps with color application. Invest in a self-healing cutting mat and fresh blades; dull tools create ragged edges that bleed. Always test your material with your chosen color formula before investing hours in cutting.
Digital Design Tools for Precision Cutting
Vector-based software like Adobe Illustrator or free alternatives like Inkscape let you create mathematically perfect designs. The key is understanding cut width—your blade removes material, so your design must account for this kerf. For intricate details, ensure no cutout is smaller than 2mm; anything tinier won’t survive application. Export files as SVG for most cutting machines, but check your device’s specifications. Some advanced users create multi-layered stencil files, designing interlocking pieces that assemble into complex 3D shapes for wrapping around hair sections.
Safety Considerations for DIY Stencil Making
Never cut stencils from materials not specifically designed for skin contact. Some plastics contain phthalates or other chemicals that can be absorbed through the scalp. Always work in a well-ventilated area when cutting, as the process can release microscopic plastic particles. Test your homemade stencil on a small, hidden hair section first; some adhesives or materials react unexpectedly with color formulas. If using a laser cutter, ensure proper ventilation and never leave it unattended—stencil materials can flare quickly. Keep a fire extinguisher rated for electrical fires nearby.
Budget Considerations and Value Assessment
Building a stencil collection is an investment in your creative expression. Smart purchasing decisions stretch your budget without compromising quality.
Price vs. Quality: Finding the Sweet Spot
The cheapest stencils (under $5 each) typically use thin, brittle plastic that warps after one use. Mid-range options ($8-15) offer decent durability but may lack precision in fine details. Premium stencils ($20+) use professional-grade materials and laser-cutting technology that maintains accuracy through hundreds of applications. However, price doesn’t always equal value. A $25 stencil you use weekly costs less per use than a $10 stencil you replace monthly. Calculate cost-per-application when comparing options. Also consider bundle deals; purchasing a curated set often costs 30-40% less than buying individual pieces.
Starter Kits vs. Individual Pieces
Beginners benefit from starter kits that include a variety of designs and sizes. These collections are thoughtfully curated to teach you what styles you gravitate toward. The downside? They often include filler designs you’ll never use. Building your collection piecemeal costs more initially but ensures every stencil earns its place. A hybrid approach works best: start with a small, high-quality kit covering basic categories (geometric, floral, one statement piece), then add individual stencils as you identify gaps in your creative arsenal. This prevents accumulating unused designs while still providing foundational variety.
Investing in Professional-Grade Options
Professional-grade stencils aren’t just for stylists—they’re for anyone serious about consistent results. These stencils feature reinforced edges, multi-layer construction for complex designs, and often include exclusive access to tutorial content. The investment makes sense if you stencil weekly or create looks for others. Look for professional lines that offer replacement programs; some companies will re-cut worn stencils at a fraction of the original cost. Also consider resale value—professional stencils from reputable sources maintain value in secondary markets, while cheap versions have no resale potential.
Troubleshooting Common Stencil Issues
Even experienced users encounter problems. Knowing how to diagnose and fix issues saves time, product, and frustration.
Bleeding and Blurring: Prevention and Fixes
Bleeding almost always stems from poor contact between stencil and hair. If you notice color seeping underneath, stop immediately. Remove the stencil, blot away excess product, and use a dry toothbrush to gently lift any color that’s bled. Let the area dry completely before reattempting. Prevention is easier: ensure hair is completely dry before application (dampness wicks color underneath), use minimal product buildup (multiple light layers trump one heavy one), and consider a barrier spray—light hairspray applied to hair before stenciling creates a slight seal that repels color migration.
Stencil Slippage During Application
If your stencil moves mid-application, you’ve likely got static, product overload, or improper securing. For immediate salvage, carefully lift the stencil straight up without dragging, then use a cotton swab dipped in micellar water to clean up the misplaced color. Let it dry, then reposition. To prevent future slippage, reduce the amount of product on your applicator—overloaded brushes and sprays create slick surfaces that stencils can’t grip. For spray applications, hold the can at least 8 inches away; close-range spraying creates wet, heavy color that pools and lifts stencils.
Color Transfer Issues and How to Solve Them
Uneven transfer—where some areas receive dense color while others remain faint—usually indicates pressure inconsistencies or hair texture variations. For brush applications, use a stippling motion rather than sweeping strokes; this deposits color evenly regardless of hair density. If certain areas consistently resist color, pre-treat them with a light texturizing spray; this roughs up the cuticle slightly, allowing better pigment adhesion. For spray formulas, practice your arc—move the can in a smooth, consistent curve across the stencil, starting and ending slightly beyond the edges to avoid buildup at the borders.
Hair Health and Safety Considerations
Creative expression should never compromise hair and scalp health. Responsible stenciling practices ensure you can keep creating without damage.
Protecting Your Scalp During Application
The scalp is delicate and absorbs chemicals readily. Always apply a thin barrier—coconut oil or a dedicated scalp protector—along the hairline and part lines before stenciling. This prevents staining and irritation. Never apply stencils directly to the scalp; leave a 2-3mm buffer of hair at the roots. This protects the skin and creates a more natural look, as hair doesn’t grow in perfect stencil patterns. If you experience tingling or burning, remove the product immediately; some temporary colors contain alcohol that can irritate sensitive scalps.
Choosing Non-Toxic Color Formulas
Not all temporary colors are created equal. Avoid formulas containing PPD (paraphenylenediamine), a common allergen in hair dyes that has no place in temporary products. Look for water-based formulas for chalks and sprays, and mineral-based options for pigments. If a product has a strong chemical smell, it’s likely releasing VOCs (volatile organic compounds) that you shouldn’t inhale. Always check for FDA approval or cosmetic safety certifications. When trying a new formula, do a patch test on your inner arm 48 hours before full application.
When to Avoid Stenciling Altogether
Freshly bleached or chemically treated hair is highly porous and may stain permanently even with “temporary” colors. Wait at least two weeks post-treatment before stenciling. Avoid stenciling on compromised scalps—sunburned, irritated, or broken skin can react badly to any product. If you’re experiencing significant hair loss or thinning, stenciling can exacerbate the issue by pulling on fragile strands. Similarly, very fine, brittle hair may not withstand the manipulation required for precise stencil work. In these cases, consider temporary extensions that you can stencil separately and clip in.
Organizing and Maintaining Your Collection
A disorganized collection leads to unused stencils and wasted money. Proper organization streamlines your creative process.
Cataloging Your Stencils for Easy Access
Create a digital catalog by photographing each stencil against a contrasting background, then tagging them by category, size, and complexity. Apps like Notion or Airtable let you build searchable databases. For physical organization, use clear plastic sleeves with printed inserts showing the stencil’s design. Number each stencil and maintain a master list of which designs work best with which color formulas. This prevents experimentation errors and helps you quickly locate the perfect piece for any idea.
Cleaning Schedules Based on Usage Frequency
Daily-use stencils need cleaning after every application to prevent cross-contamination. Weekly-use pieces can be cleaned monthly with a deep soak in gentle soap. Seasonal stencils should be cleaned before storage and again before their annual use. Keep a log of cleaning dates; it’s easy to forget when a stencil was last maintained. For heavy users, consider a rotation system: clean all stencils used in a month on the last Sunday, ensuring nothing sits with dried product for extended periods.
Storage Systems That Prevent Warping
Flat storage is non-negotiable. Use artist’s portfolio books with rigid pages, or store stencils between sheets of acid-free cardboard in shallow drawers. Never hang stencils; gravity will cause them to stretch and distort over time. For travel, use hard-shell cases designed for art supplies—these have individual elastic straps that hold each stencil flat without pressure points. If a stencil does warp, place it between two heavy books in a warm (not hot) environment for 24-48 hours; this often restores flatness. Silicone stencils can be gently heated with a hairdryer and pressed flat, but plastic versions will melt.
Seasonal and Trend-Based Design Categories
Smart collectors anticipate needs before they arise, building seasonal versatility into their libraries.
Festival-Ready Motifs for Summer
Festival season demands bold, photogenic designs that hold up under intense conditions. Look for UV-reactive stencil patterns that glow under blacklight—a feature that’s engineered into the design, not just the color. These stencils have specific cut densities that maximize glow effects. Waterproof considerations matter; designs should be simple enough that sweat won’t cause them to run into unrecognizable blobs. Tribal-inspired patterns, sacred geometry, and bold animal prints dominate festival culture, but having a few unexpected options (like Art Deco motifs or retro video game graphics) helps you stand out in crowded fields.
Holiday Collections: More Than Just Novelty
Holiday stencils earn their keep when they transcend their seasonal origins. A quality Halloween stencil set might include intricate spider webs that double as lace patterns for romantic updos. Christmas collections with stylized evergreens can become winter forest scenes for January events. The key is avoiding dated, cartoonish imagery in favor of sophisticated, symbolic designs. A single, well-cut menorah stencil, for example, can be used for Hanukkah, then repurposed as a candelabra for Gothic looks year-round. Invest in holiday designs that have strong silhouettes and minimal text.
Timeless Patterns That Never Go Out of Style
Certain designs have endured for decades: paisley, Art Nouveau flourishes, classic houndstooth, and simple stars. These stencils are worth splurging on because they’ll never feel dated. When evaluating timeless patterns, prioritize those with multiple size options within the same design family. A paisley that comes in small, medium, and large lets you create cohesive, layered looks. Also consider negative space versions—where the pattern is the uncut area—of classic designs, effectively doubling your options without buying more stencils.
Frequently Asked Questions
How long do quality hair stencils typically last with proper care?
Professional-grade stencils can withstand 200-300 applications when cleaned and stored correctly. Plastic versions may develop micro-cracks around fine details after about 150 uses, while silicone stencils often last indefinitely but may lose their tackiness over time. The key factor is immediate cleaning—stencils left with dried product for even 24 hours see their lifespan cut by half. Rotate your most-used designs to distribute wear evenly across your collection.
Can I use the same stencils on both light and dark hair?
Absolutely, but you’ll need different color strategies. On light hair, most temporary colors show true to shade. On dark hair, you’ll need highly pigmented formulas or pre-lightened sections for colors to pop. The stencil itself doesn’t care about hair color, but some designs are more effective on certain bases. Fine line work disappears on very dark hair unless you use metallic or neon shades. Keep separate sets of stencils for light and dark applications to prevent cross-contamination of pigment residues.
What’s the best way to practice before applying to my actual hair?
Purchase a cheap, light-colored synthetic wig from a costume shop—this gives you a realistic canvas without commitment. You can also practice on thick poster board with a slight texture, which mimics hair’s resistance. Some professionals use carpet samples (clean ones!) to practice pressure control. The most valuable practice, though, is on small, hidden sections of your own hair, like the underside of a bottom layer. This teaches you how your specific hair texture interacts with stencils and color.
How do I prevent temporary color from staining my skin along the hairline?
Apply a thin layer of petroleum jelly or a dedicated barrier cream along the hairline, ears, and neck before you begin. Use a cotton swab for precision application, staying strictly on skin, not hair. For extra protection, after applying the stencil, use a clean makeup brush to dust translucent powder over the exposed skin; this creates a secondary barrier that catches overspray. If you do get stains, remove them immediately with micellar water or baby oil—don’t wait until after you’ve finished your full design.
Are there any hair types that don’t work well with stenciling?
Extremely fine, slippery hair can be challenging because stencils don’t adhere well. Very short buzz cuts (under 1/4 inch) don’t have enough length to hold a design. Overly processed, brittle hair may break during the manipulation required for precise placement. However, most issues can be solved with proper prep: texturizing spray for fine hair, slightly longer growth for short styles, and deep conditioning treatments for damaged hair. The only truly incompatible hair is that which is actively breaking or shedding due to medical conditions.
How fine can stencil details realistically be?
The practical limit is about 1mm for home application. Anything smaller requires professional equipment and perfectly still models. For DIY use, look for stencils where the smallest details are at least 2-3mm wide. Remember that hair isn’t a flat surface; fine details get lost in the natural variation of hair texture and growth direction. Designs that appear intricate on paper often read as muddy on hair. The most effective “detailed” stencils use clever negative space and optical illusions rather than actual fine lines.
Can I cut my own stencils from regular craft materials?
While possible, it’s not recommended for anything beyond experimental play. Standard craft plastics are too thin and warp with moisture from color formulas. They also often contain chemicals not safe for prolonged scalp contact. If you must DIY, use stencil blanks specifically marketed for cosmetic use, which are made from skin-safe, durable materials. Never use materials like cardboard (absorbs color and disintegrates) or metal (can cut skin and damages hair). The time and cost of proper DIY materials often exceed buying professional stencils.
What’s the ideal hair length for stenciling?
You need at least 1-2 inches of length for designs to be visible. The sweet spot is 3-6 inches, where hair is long enough to lay flat and hold detail but not so long that it becomes unwieldy. Very long hair (past shoulders) can be sectioned and stenciled in panels for continuous designs. The key isn’t length but preparation—hair must be smooth and tangle-free. Use a fine-tooth comb and light styling product to create a controlled canvas, regardless of length.
How do I remove temporary color if I make a mistake?
Act fast. Most temporary colors haven’t set fully within the first 5-10 minutes. Use a dry toothbrush to gently lift as much color as possible without water. Then apply a clarifying shampoo directly to the dry hair, work it in, and rinse with the hottest water you can tolerate. For stubborn spots, create a paste with equal parts shampoo and baking soda, apply to the mistake, and let it sit for 2-3 minutes before rinsing. Never scrub vigorously; you’ll damage hair and potentially drive pigment deeper into the cuticle.
Can stenciling damage my hair over time?
The stenciling itself—applying and removing templates—is mechanically neutral if done gently. The risk comes from color formulas and cleaning agents. Alcohol-heavy sprays can dry out hair with repeated use; alternate with moisturizing treatments. Frequent washing to remove color strips natural oils; use sulfate-free shampoos and deep condition weekly. The physical manipulation of sectioning and holding hair taut can cause breakage if overdone. Limit intensive stenciling sessions to 2-3 times per week, and give your hair “rest days” with minimal styling and maximum conditioning.