Gone are the days when at-home hair color meant a one-size-fits-all box that left your locks feeling like straw. Today’s salon-quality hair color kits have revolutionized the DIY beauty landscape, bringing professional-grade formulations, precision tools, and transformative results directly to your bathroom sink. Whether you’re looking to touch up stubborn grays, embrace a bold new shade, or simply refresh your current color with multi-dimensional shine, the right kit can deliver results that rival a $200 salon visit—for a fraction of the cost.
But here’s the truth: not all “salon-quality” labels are created equal. The difference between a mediocre outcome and a truly professional-looking finish lies in understanding the technology, ingredients, and techniques that define premium at-home color. This comprehensive guide will walk you through everything you need to know to select and use a salon-quality hair color kit that genuinely transforms your look, without the trial-and-error frustration that leaves many reaching for a hat.
Top 10 Hair Color Kits at Home
Detailed Product Reviews
1. L’Oreal Paris Couleur Experte 2-Step Home Hair Color and Highlights Kit, French Éclair

Overview: The L’Oreal Paris Couleur Experte kit revolutionizes at-home hair coloring by combining permanent base color and harmonizing highlights in one convenient package. This dual-system approach promises salon-quality results in just 30 minutes, making it an attractive option for those seeking dimensional color without the salon price tag.
What Makes It Stand Out: The only at-home kit offering perfectly coordinated base and highlight shades, eliminating guesswork. The two-step process ensures rich, elegant color with precise, even highlights. As part of L’Oreal’s extensive beauty portfolio, it benefits from decades of color expertise and innovation.
Value for Money: At $13.97, this kit costs significantly less than a salon visit (which can exceed $150 for similar services). The coordinated system prevents costly color mismatches, and the 30-minute application saves time. For occasional color refreshers, it’s an economical alternative to professional services.
Strengths and Weaknesses: Strengths include brand reliability, coordinated shades, speed, and comprehensive instructions. Weaknesses involve potential difficulty for beginners, limited shade range compared to salons, and the risk of uneven highlights without proper technique. The single-use nature means no touch-ups without repurchasing.
Bottom Line: Ideal for confident DIYers seeking dimensional color on a budget. While not replacing professional colorists for complex jobs, it delivers impressive results for straightforward applications. Practice and patience yield salon-worthy highlights at a fraction of the cost.
2. Ogilvie Salon Styles Home Perm The Original - For Color Treated, Thin, or Delicate Hair - 1 Application
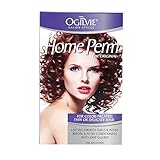
Overview: Ogilvie’s Home Perm Kit brings salon-quality waves to your bathroom, specifically engineered for color-treated, thin, or delicate hair that traditionally struggles with perm solutions. This heat-activated formula promises professional results while minimizing damage to vulnerable strands.
What Makes It Stand Out: The heat activator formula gently processes waves without harsh chemicals, while the drip guard ensures mess-free application. Its fresh scent addresses the typical perm odor issue. Most importantly, it’s one of the few at-home perms explicitly designed for delicate and color-treated hair, filling a significant market gap.
Value for Money: At $12.97, it’s a fraction of salon perm costs ($80-$200). For those with delicate hair requiring specialized treatment, it offers accessible permanent waves without compromising hair health. Single-use packaging ensures fresh product each time.
Strengths and Weaknesses: Strengths include specialization for delicate hair, heat activation for gentler processing, drip guard, and cost savings. Weaknesses involve inherent risks of home chemical treatments, potential for inconsistent results, and the single-application format. Even with “fresh scent,” chemical odors persist.
Bottom Line: Perfect for those with fine or color-treated hair seeking affordable waves. However, first-timers should proceed cautiously and follow instructions meticulously. While it reduces risks for delicate hair, professional consultation remains wise for severely compromised strands.
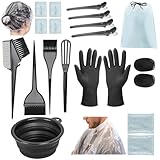
3. Xarchy 19 Pcs Professional Hair Bleach Kit Hair Coloring Products with Hair Dye Brush, Hair Color Bowl, Hairclips, Applicator, Earmuffs for Hair Highlighting and Hair Coloring at Home

Overview: The Xarchy 19-piece kit provides professional-grade tools for at-home hair coloring and highlighting. This comprehensive set includes everything needed for precise application—brushes, bowls, clips, earmuffs, gloves, and a storage bag—though hair dye itself must be purchased separately.
What Makes It Stand Out: The kit’s completeness stands out, offering specialized tools like silicone earmuffs and multiple brush shapes for different techniques. All accessories are reusable and easy to clean, making it environmentally friendly and cost-effective for regular users. The included storage bag keeps everything organized.
Value for Money: At $9.99 ($0.53 per piece), it offers exceptional value compared to purchasing tools individually. Reusability means one purchase serves multiple coloring sessions, amortizing the cost further. For frequent DIY colorists, it eliminates repeated disposable tool purchases.
Strengths and Weaknesses: Strengths include comprehensive tool selection, reusability, quality materials, and versatility for all hair types. Weaknesses involve the lack of actual dye/bleach, potential overwhelm for one-time users, and storage requirements. The kit may exceed casual users’ needs.
Bottom Line: An excellent investment for regular home colorists seeking professional tools. While beginners might find the array daunting, it elevates DIY results significantly. For occasional users, a smaller kit might suffice, but the quality and reusability justify the price.
4. Revlon Color Effects Highlighting Kit, Permanent Hair Dye, For Balayage, Frosting, & Ombre Styling, Ammonia & Paraben Free, 20 Blonde, 8 Oz (Pack of 1)
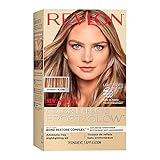
Overview: Revlon’s Color Effects Highlighting Kit offers versatile at-home highlighting options for creating balayage, frosting, and ombre effects. The ammonia-free, paraben-free formula includes anti-breakage technology and a violet-pigmented conditioner to combat brassiness, specifically targeting health-conscious consumers seeking professional looks.
What Makes It Stand Out: The dual-application method (cap-and-hook or freehand painting) provides flexibility for different skill levels and desired effects. The Bond Restore Complex minimizes damage, while the violet conditioner maintains cool blonde tones. Its ammonia-free formulation appeals to those avoiding harsh chemicals.
Value for Money: At $6.94 ($0.87 per ounce), it’s remarkably affordable for a multi-technique highlighting system. Salon balayage can cost $150-$300, making this an accessible entry point. The 8-ounce size provides ample product for multiple applications or long hair.
Strengths and Weaknesses: Strengths include versatile application methods, damage-reducing formula, brass-fighting conditioner, and low cost. Weaknesses involve limited shade options (only two), potential difficulty achieving professional balayage results, and the need for skill to avoid patchiness.
Bottom Line: A budget-friendly option for experimenters wanting to try highlights without major investment. While it won’t replace expert balayage, proper technique yields natural-looking results. Best for those comfortable with DIY beauty and willing to practice.
5. 19PCS Hair Dye Kit, Hair Coloring Products with Hair Dye Brush, Collapsible Bowl, Clips, Ear Muffs, Disposable Gloves, Scarf, Shower Cap

Overview: This 19-piece hair dye kit provides essential tools for at-home coloring, featuring a collapsible bowl and multiple applicators. Designed for salon-quality results at home, it includes brushes, clips, protective gear, and shower caps, though hair dye must be purchased separately.
What Makes It Stand Out: The collapsible bowl offers space-saving storage, while the inclusion of multiple ear muffs and gloves accommodates several uses. Three different brush shapes cater to various coloring techniques, from root touch-ups to full highlights. The kit’s versatility extends beyond coloring to keratin treatments and styling.
Value for Money: At $5.99 total, this is one of the most affordable comprehensive kits available. The reusable nature and quality materials provide long-term value, especially for regular users. Compared to purchasing disposable supplies repeatedly, it pays for itself within 2-3 uses.
Strengths and Weaknesses: Strengths include ultra-low price, collapsible bowl design, multiple protective items, and versatility. Weaknesses involve potential quality concerns at this price point, no included dye, and possible overabundance of tools for casual users. Durability may vary with heavy use.
Bottom Line: An unbeatable value for budget-conscious colorists who need a full toolset. While professional stylists might prefer higher-end tools, this kit serves home users admirably. Perfect for beginners wanting to experiment without significant investment, provided you purchase quality dye separately.
6. Garnier Hair Color Nutrisse Ultra Color Nourishing Creme, BY1 Ultra Balayage (Icing Swirl) Blonde Permanent Hair Dye, 1 Count (Packaging May Vary)

Overview: Garnier’s Nutrisse Ultra Color BY1 Ultra Balayage kit brings salon-style highlighting to your home, specifically formulated for those with natural hair ranging from dark blonde to dark brown. This permanent dye delivers the popular balayage effect with a specialized “Icing Swirl” blonde shade, adapting to all hair textures for lasting results.
What Makes It Stand Out: The kit features Color Boost Technology that intensifies highlights in a single step, delivering vibrant color for up to eight weeks. What truly distinguishes this product is its nourishing blend of five fruit oils—avocado, olive, coconut, argan, and shea—that condition hair during the coloring process. The included after-color mask locks in moisture, ensuring your highlights look smooth and silky rather than dry or brassy. Plus, it’s cruelty-free and vegan, appealing to ethically-conscious consumers.
Value for Money: At $8.97, this kit offers exceptional value compared to professional balayage services that can cost $150 or more. It’s a single-application kit that’s affordable enough for regular touch-ups, making high-end highlighting accessible without the salon price tag.
Strengths and Weaknesses: Strengths include the oil-rich nourishing formula, targeted formulation for darker hair bases, straightforward at-home application, and ethical credentials. Weaknesses involve potential inconsistent results for beginners, possible brassiness if not applied correctly, and the fact that it’s a one-time-use kit. Some users may find the lightening power insufficient for very dark brown hair.
Bottom Line: This Garnier kit is an excellent entry point for anyone wanting to try balayage at home without significant investment. It’s best suited for those with some coloring experience who want nourishing, cruelty-free highlights on a budget.
7. L’Oreal Paris Couleur Experte 2-Step Home Hair Color and Highlights Kit, Chocolate Mousse

Overview: L’Oreal’s Couleur Experte offers a unique dual-system approach to at-home hair coloring, combining permanent base color with harmonizing highlights in one convenient kit. The Chocolate Mousse shade delivers rich, dimensional brunette tones with professional-looking results in just 30 minutes.
What Makes It Stand Out: This is the only at-home kit that seamlessly integrates both all-over color and precise highlights in a coordinated two-step process. The perfectly matched shades eliminate the guesswork of combining separate products, while the streamlined application achieves salon-like elegance without multiple trips to the store. The 30-minute processing time is remarkably efficient for such comprehensive results.
Value for Money: Priced at $17.99, this kit sits in the mid-range category—more expensive than single-process dyes but far more economical than a full salon service costing $100+. You’re essentially getting two services in one box, making it cost-effective for those wanting both base color and highlights.
Strengths and Weaknesses: Strengths include the all-in-one convenience, time-saving application, professionally coordinated shades, and reliable brand reputation. Weaknesses are the limited shade range compared to separate products, potentially overwhelming complexity for complete beginners, and a higher price point than basic color kits. The two-step process requires careful timing and attention to detail.
Bottom Line: Ideal for intermediate users seeking a complete color transformation, this kit delivers impressive dimensional results. It’s perfect for those comfortable with at-home coloring who want salon-quality highlights and base color without the appointment.
8. ROOHUA 16 Pieces Hair Dye Coloring Kit- Hair Tinting Bowl, Hair agitator, Dye Brush, Ear Cover, Hairpin, Hair Coloring Cape For Hair Dye Tools

Overview: ROOHUA’s 16-piece kit provides a comprehensive collection of professional-grade tools for at-home hair coloring, micro braiding, and highlighting. This reusable set includes everything from mixing bowls to protective capes, making it a versatile foundation for DIY hair projects.
What Makes It Stand Out: The kit excels in its completeness and reusability. The EVA gelatinous shawl offers superior protection compared to flimsy disposable alternatives, while the transparent storage bag with a strong zipper keeps everything organized. The high-quality mixing bowl features a convenient handle and folds for storage. Multiple hair clips, soft earmuffs, and both reusable and disposable gloves demonstrate thoughtful inclusion of essentials.
Value for Money: At $9.99, this kit delivers outstanding value. Purchasing these items individually would cost significantly more, and the reusable nature means you can achieve salon-quality results across multiple coloring sessions. It’s a one-time investment that pays for itself after just two uses.
Strengths and Weaknesses: Strengths include comprehensive tool coverage, durable reusable materials, excellent organization, and versatility for various hair treatments. Weaknesses may include a relatively small bowl size for very long hair, brushes that might not meet professional salon standards, and the absence of hair dye in the package. Some users might prefer more clips for sectioning.
Bottom Line: This ROOHUA kit is the perfect starter set for anyone serious about DIY hair coloring. It provides professional-level tools and protection at a fraction of salon costs, making it an essential investment for regular at-home colorists.
9. Svjetiq 21Pcs Hair Dye Kit Professional Hair Coloring Products with Hair Dye Brush, 350ml Hair Color Bowl, Hair Clips, Applicator, Earcover for Salon Bleaching & Hair Coloring at Home
Overview: Svjetiq’s 21-piece kit offers the most comprehensive tool collection in its price range, designed for both home enthusiasts and salon professionals. With multiple brush types and a generous 350ml bowl, it accommodates all hair types and coloring techniques from root touch-ups to full bleaching sessions.
What Makes It Stand Out: The kit’s standout feature is its exceptional variety—21 pieces including two different dye brushes, a comb, agitator, and four disposable caps. The large 350ml bowl handles substantial color mixes for long or thick hair, while the stiff-bristled brushes excel at precise root applications. The transparent storage bag simplifies organization and travel.
Value for Money: At just $7.99, this kit represents unbeatable value. It’s the lowest-priced option while offering the most pieces, making it accessible for beginners hesitant to invest heavily. The reusable components ensure continued value across numerous coloring sessions.
Strengths and Weaknesses: Strengths include the impressive piece count, large bowl capacity, variety of brush shapes for different techniques, and budget-friendly pricing. Weaknesses involve potentially lower durability compared to premium brands, inclusion of disposable items that add waste, and no protective cape included. The quality may not satisfy professional stylists.
Bottom Line: For budget-conscious buyers seeking maximum tool variety, this Svjetiq kit is unmatched. It’s ideal for beginners experimenting with home coloring or as a backup set for professionals, delivering everything needed for successful applications at an incredibly low price.
10. Revlon Color Effects Highlighting Kit, Permanent Hair Dye, For Balayage, Frosting, & Ombre Styling, Ammonia & Paraben Free, 30 Honey, 8 Oz (Pack of 1)
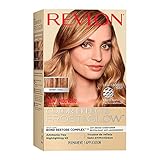
Overview: Revlon’s Color Effects Highlighting Kit provides versatile, salon-inspired lightening for creating custom balayage, frosting, and ombre effects. The 30 Honey shade is formulated for light to dark brown hair, delivering sun-kissed highlights without harsh ammonia or parabens.
What Makes It Stand Out: The dual-application method sets this kit apart—use the LightZones Cap & Hook for precise, traditional highlights or apply freehand for modern balayage effects. The Bond Restore Complex technology minimizes breakage during lightening, while the violet-pigmented conditioner neutralizes brassy tones, a common DIY highlighting pitfall.
Value for Money: At $12.49, this specialized kit offers solid value. It’s priced competitively for a single-process lightener with advanced damage protection and conditioning benefits. Compared to separate lightener and toner purchases, it consolidates essentials in one box.
Strengths and Weaknesses: Strengths include versatile application options, damage-reducing formula, brass-fighting conditioner, and clean ingredient profile free of ammonia and parabens. Weaknesses are the limited shade selection (only two options), challenging cap method for novices, and results heavily dependent on user skill. It may not lift very dark hair sufficiently.
Bottom Line: This Revlon kit suits intermediate to advanced DIY colorists who want flexibility in highlighting techniques. It’s particularly valuable for those prioritizing hair health and natural ingredients while creating customized, dimensional blonde effects at home.
The Evolution of At-Home Hair Color
Why Salon-Quality Results Are Now Possible at Home
The at-home hair color industry has undergone a seismic shift over the past decade. What once relied on harsh, generic formulations has evolved into sophisticated systems that mirror professional salon chemistry. Modern kits now incorporate bond-building technology, ammonia-free alkalizing agents, and encapsulated pigment delivery systems that were once exclusive to high-end color houses. This transformation means you can achieve even coverage, luminous shine, and long-lasting results without compromising your hair’s structural integrity.
The game-changer? Brands have started licensing professional-grade technology previously reserved for licensed cosmetologists. We’re talking about oxidative dyes with smaller pigment molecules for deeper penetration, pH-balanced developers that open the cuticle just enough, and pre-color treatments that prep your hair like a canvas. The result is a category of products that doesn’t just promise salon results—it delivers them when used correctly.
Understanding Professional vs. Box Dye Technology
Traditional box dyes operate on a “one-formula-fits-all” principle, using standardized developer strengths and generic pigment loads. Salon-quality kits, conversely, operate on the principle of customization. They separate the color tube from the developer, allowing you to adjust the volume based on your specific needs—whether you’re depositing color, covering gray, or lifting your base shade.
Professional-grade kits also utilize oxidative coupling reactions that happen in stages, giving you more control over the final result. Instead of dumping all pigment at once, these formulations release color molecules sequentially, allowing for more natural-looking, multi-dimensional results. This technology prevents that flat, “painted-on” appearance that has plagued DIY color for decades.
Key Ingredients That Define Salon-Quality
Ammonia-Free Formulations: What You Need to Know
While “ammonia-free” has become a marketing buzzword, understanding what replaces ammonia is crucial for true salon-quality results. Premium kits use ethanolamine (MEA) or other alkalizing agents that open the hair cuticle more gently, preserving the hair’s natural lipid layer. This means less swelling of the hair shaft, reduced cuticle damage, and significantly less post-color frizz.
However, not all ammonia alternatives are equal. Look for kits that disclose their alkalizing agent concentration—ideally between 1.5-3% for optimal color penetration without excessive damage. Some high-end formulations also include pH stabilizers that gradually neutralize during processing, automatically closing the cuticle as color develops. This self-neutralizing technology is a hallmark of truly professional-grade kits.
The Role of Bond Builders in Modern Hair Color
Bond-building technology represents the single biggest advancement in at-home hair color. These proprietary systems (often labeled as “plex” technology) work by creating artificial disulfide bonds within the hair shaft during the coloring process. As the alkalizing agent opens the cuticle and lifts the cuticle scales, bond builders simultaneously reinforce the internal protein structure.
The science is fascinating: these molecules contain dual-action compounds that seek out broken bonds and cross-link them, essentially rebuilding your hair’s internal architecture while color processes. This means you can achieve dramatic transformations—like going from dark brown to caramel—without the characteristic breakage and brittleness. When evaluating kits, prioritize those that include a dedicated bond-building additive or have it integrated directly into their color formula.
Natural Oils and Conditioning Agents
Salon-quality kits distinguish themselves through sophisticated conditioning systems that go beyond basic silicones. Look for formulations rich in argan oil, keratin amino acids, and plant-based ceramides. These ingredients serve multiple functions: they lubricate the hair shaft during application for even distribution, protect the scalp from irritation, and deposit conditioning agents that remain after rinsing.
The presence of chelating agents like EDTA is another professional touch—these ingredients bind to mineral deposits in your water, preventing them from interfering with color development. This is particularly important if you have hard water, which can cause uneven results and premature fading. Premium kits also include antioxidant complexes (often vitamin E-based) that protect the freshly deposited pigment from oxidative damage the moment you step out of the shower.
Decoding Developer Volumes: A Complete Guide
10 Volume vs. 20 Volume: Making the Right Choice
Developer volume determines how many levels of lift you’ll achieve and how deeply pigment penetrates. Ten volume (3% peroxide) is your go-to for deposit-only applications—think going darker, refreshing faded color, or blending gray without significant lifting. It’s the gentlest option and ideal for maintaining hair health while achieving rich, dimensional results.
Twenty volume (6% peroxide) is the workhorse of at-home color, providing one to two levels of lift while depositing color. This is your sweet spot for covering resistant gray hair, lightening your base shade slightly, or achieving vibrant fashion colors on naturally dark hair. Salon-quality kits will clearly label developer strength and often provide guidance on when to use each volume based on your starting point and desired result.
When to Use 30 or 40 Volume Safely
Thirty volume (9% peroxide) enters more aggressive territory, lifting two to three levels. While some salon-quality kits include this option, it should be approached with caution at home. Reserve 30 volume for significant lightening when your hair is in excellent condition, and always pair it with a robust bond-building system. Never use it on previously colored hair, as the overlapping processing can cause severe breakage.
Forty volume (12% peroxide) is rarely necessary for at-home use and is generally excluded from true salon-quality kits marketed to consumers. If you need this level of lift, you’re better served by a professional who can monitor the process and prevent catastrophic damage. Quality kits will be transparent about these limitations rather than encouraging dangerous DIY practices.
Understanding Your Hair’s Undertones
The Color Wheel Theory for Hair
Mastering at-home color requires understanding that your hair isn’t just “brown” or “blonde”—it exists on a spectrum of underlying pigments that will dramatically affect your final result. The universal law of color applies: opposite colors neutralize each other. If you’re pulling unwanted orange tones, you need blue-based pigments. Fighting brassy yellow? Reach for violet.
Salon-quality kits account for this by offering shades with specific base tones clearly labeled. You’ll see notations like “N” for neutral, “A” for ash (green-blue base), “G” for golden, or “R” for red. Understanding these codes prevents the most common at-home coloring disaster: choosing a shade that looks beautiful on the box but turns your hair a completely unexpected color because you didn’t account for your underlying warm or cool pigments.
How Undertones Affect Your Final Result
Your natural hair’s underlying pigment acts as a canvas that either enhances or battles the color you apply. Level 1-4 hair (black to medium brown) has strong red-orange undertones that become exposed when lifted. Level 5-7 (light brown to dark blonde) reveals orange-yellow pigments. Level 8-10 (medium blonde to platinum) shows yellow-pale yellow undertones.
This means if you’re a natural level 3 (dark brown) attempting to achieve a cool ash blonde at home, you’ll need to neutralize significant red-orange warmth. Salon-quality kits designed for this transformation will include pre-tone steps or double-pigment ash bases specifically formulated to counteract these strong warm undertones. Ignoring this step is why many at-home blondes end up with brassy, coppery results.
Application Tools That Make a Professional Difference
Why a Tinting Bowl and Brush Matter
The tools included in salon-quality kits reveal much about their professional pedigree. A proper tinting bowl with measurement markings allows you to mix exact ratios—crucial because even a 10% deviation in developer-to-color ratio can alter processing and final shade. The bowl’s material matters too: non-porous plastic or glass prevents product absorption and maintains consistent viscosity.
A professional-grade tinting brush features firm, tapered bristles that provide precision application. Unlike the flimsy brushes included in basic box dyes, these allow you to paint color exactly where needed, feathering product at the roots for seamless blending. The brush’s stiffness ensures you can work the color into the hair shaft thoroughly, eliminating patchy application and ensuring every strand is saturated.
The Importance of Sectioning Clips and Foils
Proper sectioning is the difference between professional-looking results and obvious DIY work. Salon-quality kits include sectioning clips that hold hair securely without leaving marks, allowing you to work in clean, organized quadrants. This systematic approach ensures complete coverage and prevents missed spots, especially at the crown and nape where hair is densest.
While not all kits include foils, premium options provide them for advanced techniques like highlighting or lowlighting. Foils isolate sections, prevent color transfer between areas, and create heat that accelerates processing for more dramatic lift. Even for all-over color, having foils on hand lets you apply color to resistant gray sections first, giving them extra development time without over-processing the rest of your hair.
Timing Is Everything: Processing Fundamentals
How Long Should You Really Leave Color On?
The standard 30-minute processing time is a myth that leads to both under-processing and over-processing. Salon-quality kits provide variable timing based on your specific goals. For gray coverage, you often need 45 minutes to allow the larger pigment molecules to fully penetrate resistant strands. For refreshing existing color or deepening your shade, 20-25 minutes may suffice.
Temperature dramatically affects processing speed. In a cool bathroom (below 70°F), you may need to add 5-10 minutes. In a steamy environment, reduce time slightly. Premium kits include a color-checking guide, advising you to wipe a small test section at the 20-minute mark to assess development. This empowers you to make real-time decisions rather than blindly following a one-size-fits-all timer.
Factors That Affect Processing Time
Your hair’s porosity—its ability to absorb moisture—directly impacts how quickly color processes. Porous hair (from previous coloring, heat damage, or chemical treatments) grabs color faster but also releases it quicker. Virgin hair is more resistant and requires full processing time. Salon-quality kits often include a porosity test strip or questionnaire to help you adjust timing accordingly.
Previous product buildup, particularly from silicone-heavy styling products, can create a barrier that slows penetration. Premium kits address this by including a pre-color clarifying treatment that removes buildup without stripping natural oils. Water quality also plays a role: mineral-heavy hard water can interfere with color development, making a chelating pre-treatment essential for predictable results.
Gray Coverage Strategies for Stubborn Strands
Pre-Treating Resistant Gray Hair
Resistant gray hair has a tighter cuticle layer and reduced melanin, making it notoriously difficult to cover. Salon-quality kits targeting gray coverage include a pre-softening step—typically a diluted developer application that gently lifts the cuticle scales before color application. This 5-10 minute pre-treatment allows pigment to penetrate more effectively without over-processing the rest of your hair.
Another professional technique is the “gray first” application method. After sectioning, you apply color specifically to gray areas, wait 10-15 minutes, then apply color to the remainder of your hair. This gives resistant strands extra development time without over-saturating previously colored hair. Quality kits provide detailed instructions for this technique, recognizing that gray coverage is the primary reason many turn to at-home color.
Double-Pigment Technology Explained
The latest advancement in gray coverage is double-pigment technology, where color formulas contain both large and small pigment molecules. The smaller molecules penetrate quickly for immediate coverage, while larger molecules deposit on the surface for long-lasting, opaque results. This dual-action approach prevents the translucent, “shimmery” appearance that often occurs when single-pigment formulas meet resistant gray.
Salon-quality kits with this technology will explicitly mention “complete gray coverage” or “100% opaque results” and often include a separate pigment booster tube that you add to your mix for areas with more than 50% gray. This level of customization mirrors what a professional colorist would do in-salon, mixing a special booster for clients with significant gray.
Maintaining Your Salon-Quality Results
Color-Safe Shampoo and Conditioner Essentials
Your post-color routine determines how long your salon-quality results last. Immediately after coloring, your cuticle remains slightly open for up to 48 hours. Using a sulfate-free, pH-balanced shampoo is non-negotiable during this period. Sulfates strip freshly deposited pigment, while unbalanced pH can cause the cuticle to reopen, releasing color molecules.
Look for products specifically labeled “color-safe” with a pH between 4.5-5.5. These acidic formulations help seal the cuticle, locking in pigment. Premium salon-quality kits often include a post-color conditioner with cationic conditioning agents that bond to the hair’s negatively charged sites, creating a protective barrier that extends color vibrancy by up to 40%.
The 48-Hour Rule and Beyond
The first 48 hours after coloring are critical. Avoid washing, limit heat styling, and stay away from chlorinated water. When you do shampoo, use cool water—heat expands the cuticle, causing color bleed. After two weeks, incorporate a color-depositing conditioner or gloss to refresh tones and counteract brassiness.
UV protection is another overlooked factor. Just as the sun fades your furniture, it oxidizes hair pigment. Salon-quality maintenance includes UV filters in styling products or dedicated color-protecting sprays. Hard water remains a long-term enemy; monthly chelating treatments prevent mineral buildup that dulls color and creates uneven fade patterns.
Common At-Home Coloring Mistakes (And How to Avoid Them)
Root Glow and Banding Issues
“Root glow” occurs when new growth processes lighter than the mid-lengths and ends, creating a glowing halo effect. This happens because virgin hair at the roots lifts faster than previously colored hair. The professional solution is to apply color to the mid-lengths and ends first, then pull through to the roots for only the last 10 minutes of processing.
Banding appears as horizontal lines of demarcation where color overlapped unevenly. This is often caused by applying color from roots to ends in one motion without considering the different processing needs of each zone. Salon-quality kits provide zone-specific timing guides, instructing you to treat roots, mid-lengths, and ends as separate territories requiring different strategies.
Overlapping Color: The Silent Killer
Repeatedly coloring over previously colored hair causes progressive damage and dark, muddy results. Each application lifts and deposits pigment, and overlapping creates a buildup that eventually prevents proper processing. The professional technique is “root-only” application for touch-ups, using a brush to apply color precisely to new growth without touching previously colored hair.
Quality kits include precision applicator bottles or fine-tipped brushes specifically for this purpose. They also provide guidance on how far from the scalp to start your application if you have significant regrowth, preventing the “hot roots” phenomenon where hair closest to the scalp processes faster due to body heat.
When to Seek Professional Help
Recognizing When DIY Isn’t Enough
Even the best salon-quality kits have limitations. If you’re looking to make a dramatic change of more than three levels, correct a previous color disaster, or achieve complex techniques like balayage or color melting, professional expertise is worth the investment. The same applies if your hair is severely compromised from previous chemical services—adding more chemicals at home can lead to breakage that only a professional can repair.
Another red flag is uneven porosity. If some sections of your hair process color dramatically faster than others (a common issue with grown-out ombre or heavily heat-styled hair), achieving even results at home becomes nearly impossible. A colorist can use filler shades and strategic application to create an even canvas.
How to Prepare for a Salon Visit After DIY
If you’ve used at-home color and need professional correction, honesty is crucial. Many people lie to their stylists about using box dye, but this prevents them from using the correct removal techniques. Salon-quality kits are generally easier for professionals to work with because they use standard oxidative dyes rather than metallic salts found in some drugstore brands.
When scheduling your appointment, mention exactly what kit you used, how long ago, and what volume developer. Bring the instruction booklet if possible. This allows the colorist to perform accurate strand tests and choose the gentlest correction method, potentially saving you from a costly and damaging color removal process.
The True Cost Comparison: Salon vs. At-Home
Hidden Expenses Most People Forget
A salon-quality kit priced at $30-50 seems expensive compared to a $10 box dye, but the total cost of ownership tells a different story. Factor in the included professional tools (bowl, brush, clips), pre-color treatments, post-color care products, and the bond-building additives that prevent future damage-related salon visits. Suddenly, the value becomes clear.
The hidden costs of cheap box dyes include corrective salon visits (often $200+), deep conditioning treatments to repair damage, and premature color fading requiring more frequent applications. When you calculate cost-per-wear over 6-8 weeks, premium kits often prove more economical while delivering superior results.
Value Analysis Over Time
Consider the time investment: a salon appointment consumes 2-3 hours plus travel time. An at-home application takes 45 minutes to an hour, done on your schedule. For touch-ups, you save exponentially more by investing 20 minutes at home versus a full salon visit.
The real value, however, lies in education. Salon-quality kits teach you professional techniques that improve with each application. Your first attempt might take longer, but by your third, you’re working with the efficiency of a junior colorist. This skill acquisition has lasting value that extends beyond a single coloring session.
Skin Sensitivity and Allergy Protocols
The 48-Hour Patch Test: Non-Negotiable
Paraphenylenediamine (PPD) remains the most effective oxidative dye molecule but also the most allergenic. Salon-quality kits contain PPD concentrations similar to professional salon color, making patch testing absolutely essential. Apply a small amount of mixed color behind your ear or inner elbow, allow it to dry, and monitor for 48 hours.
Don’t skip this step even if you’ve colored your hair before. Sensitivities can develop suddenly after years of exposure. Premium kits include detailed patch test instructions and often provide a separate testing sachet so you don’t waste main product. Some newer formulations use PPD alternatives like para-toluenediamine sulfate (PTDS), which has lower sensitization rates but still requires testing.
Recognizing Adverse Reactions
Beyond the classic contact dermatitis (redness, itching, swelling), watch for less obvious reactions like burning sensations during processing, unusual scalp tenderness, or a feeling of heat emanating from your head. These indicate a reaction in progress and require immediate rinsing.
Salon-quality kits include emergency protocols: rinse with lukewarm (not hot) water for 15 minutes, shampoo twice with a gentle formula, and apply a cold compress. They also provide a 24-hour hotline number for adverse events—a feature missing from budget box dyes. If you experience any respiratory symptoms (difficulty breathing, wheezing), seek emergency medical care immediately, as this indicates a severe allergic reaction.
Creating Your At-Home Coloring Sanctuary
Setting Up Your Space for Success
Professional colorists don’t work in cluttered, poorly lit spaces, and neither should you. Create a dedicated coloring zone with bright, natural light or a daylight-spectrum lamp. This ensures you can see true color development and spot missed sections. Cover surfaces with disposable tablecloths or old towels—salon-quality color can stain more persistently than box dyes due to higher pigment concentrations.
Temperature control matters. A room between 70-75°F provides optimal processing conditions. Too cold and color processes unevenly; too hot and you risk over-processing. Set up a comfortable chair, have a timer ready, and keep a handheld mirror accessible for checking the back of your head. Professional-grade kits often include a checklist to ensure your space is properly prepared.
Protecting Surfaces and Skin
Vaseline around your hairline is amateur hour. Salon-quality kits include professional barrier creams that create a protective film without clogging pores. Apply this with a cotton swab along your hairline, ears, and neck. For your hands, use the included gloves (never household latex gloves, which can react with chemicals) and consider disposable salon gloves that extend up the forearm.
Protect clothing with a professional cape or old button-up shirt you can remove without pulling over your head. Keep a bowl of warm, soapy water and a stack of cotton pads nearby for immediate cleanup of drips. Premium kits provide color-remover wipes specifically formulated to lift stains from skin without harsh scrubbing that causes irritation.
Advanced Techniques for Experienced DIYers
Root Smudging and Shadow Rooting
Once you’ve mastered basic application, root smudging creates a seamless transition between your natural color and dyed lengths. After processing your roots, use a wide-tooth comb to gently pull the color down 1-2 inches, creating a gradient effect. This technique eliminates harsh lines and extends the time between touch-ups by making regrowth less noticeable.
Shadow rooting takes this further by applying a shade 1-2 levels darker than your main color just at the roots, then smudging it down. Some salon-quality kits include a separate “root shade” tube for this purpose, allowing you to create dimension and depth that mimics natural hair growth patterns. This technique is particularly effective for blondes wanting to reduce maintenance or brunettes seeking richer dimension.
Glossing and Toning Between Colors
A gloss or toner refreshes color, adds shine, and corrects undertone shifts without full commitment. Salon-quality kits often include a demi-permanent gloss that you can apply 3-4 weeks after your main color. These acidic formulations (pH 3.5-4.5) deposit pigment without lifting, perfect for combating brassiness or adding tonal richness.
Advanced users can create custom glosses by mixing a small amount of their permanent color with a clear gloss base and 5-volume developer. This “refresh” application takes only 10 minutes and extends your color’s vibrancy by weeks. The key is using a dedicated glossing bowl and brush to avoid contamination with higher-volume developers.
Your Hair’s Health: Before, During, and After
Pre-Color Treatments That Make a Difference
Healthy hair accepts and holds color better. A week before coloring, implement a protein-moisture balancing routine. Use a light protein treatment to fill in any gaps in the cuticle, followed by a hydrating mask. This creates an even canvas that processes color uniformly. Avoid heavy silicones or oils 48 hours before coloring, as they can block pigment penetration.
Salon-quality kits include a pre-color primer that removes product buildup and balances porosity. This isn’t just a clarifying shampoo—it’s a chelating treatment that removes minerals, medications, and environmental pollutants that cause unpredictable results. Apply it to dry hair, massage thoroughly, and rinse. This step alone can improve color uptake by 30% and prevent patchy results.
Post-Color Bond Repair Systems
The coloring process doesn’t end when you rinse. The 72 hours post-color are when your hair is most vulnerable. Salon-quality kits include a two-part bond repair system: an in-shower treatment that seals the cuticle and a leave-in serum that continues rebuilding bonds over several days. These systems use maleic acid or similar compounds that attach to broken bonds and strengthen them.
For ongoing maintenance, invest in a weekly bond repair mask. These treatments maintain the integrity of your color-treated hair, preventing the cumulative damage that leads to breakage over multiple coloring sessions. The best kits provide a schedule: daily leave-in for week one, every other day for week two, then weekly maintenance. This systematic approach ensures your hair remains as healthy as it looks.
Frequently Asked Questions
How long does salon-quality at-home hair color really last?
With proper care, expect 6-8 weeks of vibrant color before significant fading occurs. Gray coverage may remain opaque for 4-6 weeks, gradually softening after that. The key difference from box dyes is fade quality—salon-quality color fades true-to-tone rather than turning brassy or muddy. Using color-safe products and avoiding hot water can extend vibrancy by 2-3 weeks.
Can I go lighter at home without damaging my hair?
Going lighter always involves some damage, but salon-quality kits with integrated bond builders minimize it significantly. You can safely lift 1-2 levels at home if your hair is in good condition. Anything beyond that requires professional oversight. The key is choosing the right developer volume (20 vol maximum for most at-home lightening) and never overlapping previously lightened sections.
What’s the difference between semi-permanent and permanent salon kits?
Semi-permanent kits deposit pigment without developer, lasting 4-6 weeks. They’re ideal for trying new shades, refreshing color, or adding tone. Permanent kits use oxidative dyes and developer for lasting color that only grows out. Many salon-quality systems offer both, allowing you to use semi-permanent glosses between permanent applications for maintenance.
How do I choose the right shade for my skin tone?
Identify your skin’s undertone first. Cool undertones (pink, red, blue) pair beautifully with ash, beige, or cool brown shades. Warm undertones (yellow, peach, golden) glow with golden, caramel, or warm chocolate hues. Neutral undertones can wear almost anything. Salon-quality kits provide shade charts that indicate base tones, helping you avoid clashes.
Is it safe to color my hair while pregnant?
Most obstetricians advise waiting until the second trimester. Modern salon-quality kits with low-ammonia or ammonia-free formulations are generally considered safer than traditional box dyes. However, always perform a patch test, as pregnancy can increase sensitivity. Consider highlights instead of all-over color to minimize scalp contact, and ensure excellent ventilation.
How soon can I recolor if I’m unhappy with the results?
Wait at least 48 hours before attempting any correction. This allows your hair’s pH to normalize and gives you time to assess the true final color, which can shift slightly as it oxidizes. For major corrections, wait 1-2 weeks and use deep conditioning treatments in between. Applying more color too soon can cause severe damage and unpredictable results.
Can I use salon-quality color on previously boxed-dyed hair?
Yes, but with caution. Box dyes often contain metallic salts that react unpredictably with professional oxidative color. Wait 4-6 weeks since your last box dye application, and perform a strand test. Apply a small amount of mixed color to an inconspicuous section, process, and observe. If you see excessive heat, smoking, or bizarre color changes, do not proceed.
What’s the best way to touch up my roots at home?
Section clean, dry hair into quadrants. Mix only enough color for your regrowth—typically half the kit for touch-ups. Apply color to visible roots only, using the kit’s precision brush. Avoid overlapping onto previously colored hair. Process for the full recommended time, then emulsify (add water and work into a lather) for the final 2 minutes to blend the line of demarcation gently.
How do I prevent my color from fading?
Wash less frequently (2-3 times per week maximum), use cool water, and choose sulfate-free, color-safe products. Install a shower filter to remove fading minerals. Apply a UV-protectant spray when outdoors. Use a color-depositing conditioner every 2-3 weeks to refresh pigment. The 48-hour post-color waiting period before first shampoo is critical for longevity.
Why does my hair color turn brassy/orange?
Brassiness occurs when underlying warm pigments are exposed during lifting and not properly neutralized. This is especially common when lightening dark hair. Use an ash-toned shade with blue-green base pigments to counteract orange, or a violet-based toner for yellow tones. Hard water, sun exposure, and harsh shampoos accelerate brassiness. Monthly toning treatments prevent this shift.